Hi Everyone, So if you have through here, i believe you understood Part 1 in this series where we discussed how to configure VMware Identity Manager tenant with on-premises Connector.
Let’s go ahead and see how to configure directory in VMware Identity Manager in quick simple steps
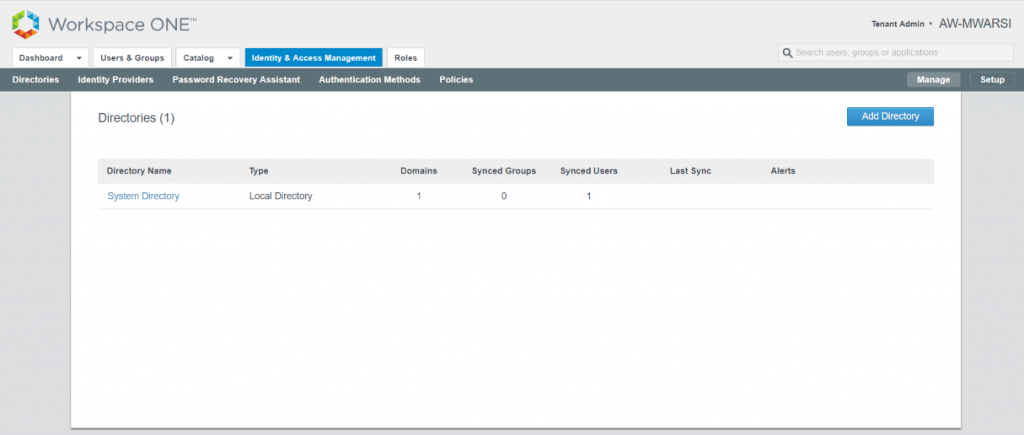
- Login to VMware Identity Manager portal and navigate to Identity & Access Management > Manage > Directories and click on Add Directory
- Enter the details for your Active Directory domain and select Active Directory (Integrated Windows Authentication)

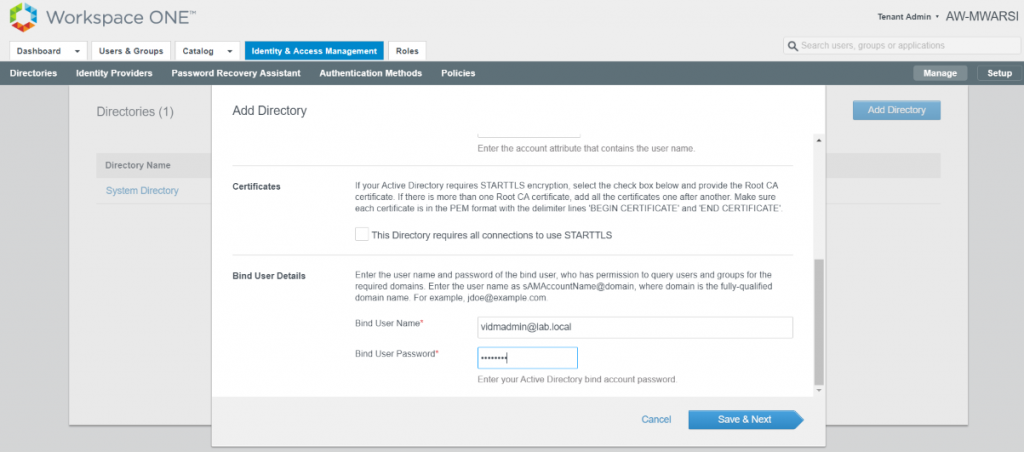
- Scroll the wizard and enter Bind User Credentials. Click on Save & Next
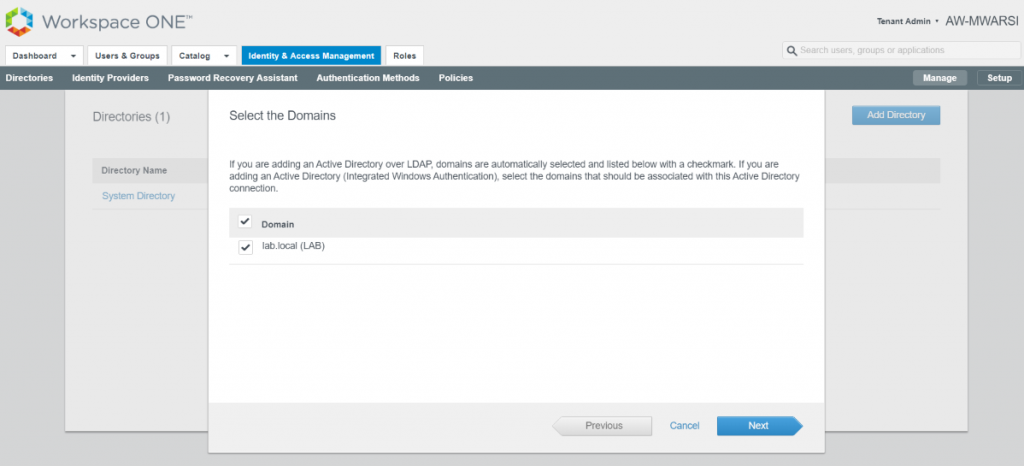
- Select the domain, you can see multiple domains in actual production scenario. Click Next
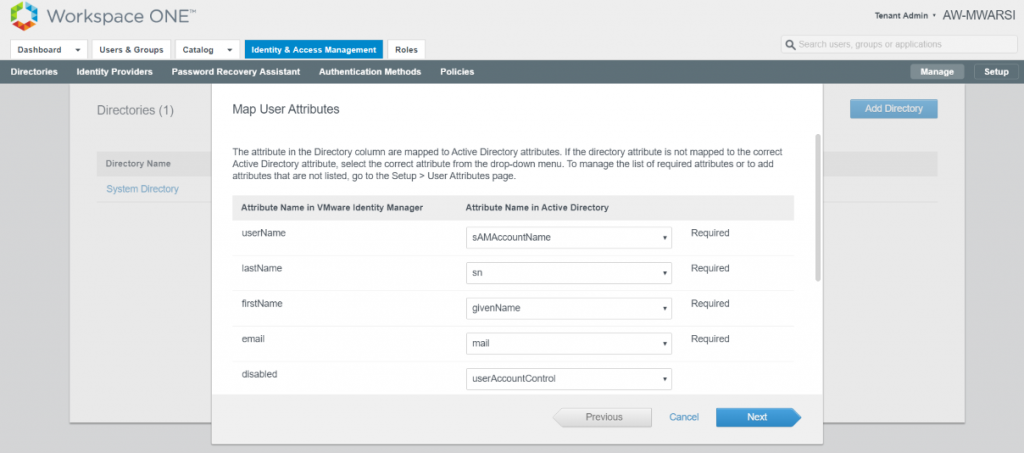
- Verify the attribute from VMware Identity Manager & Active directory and click Next
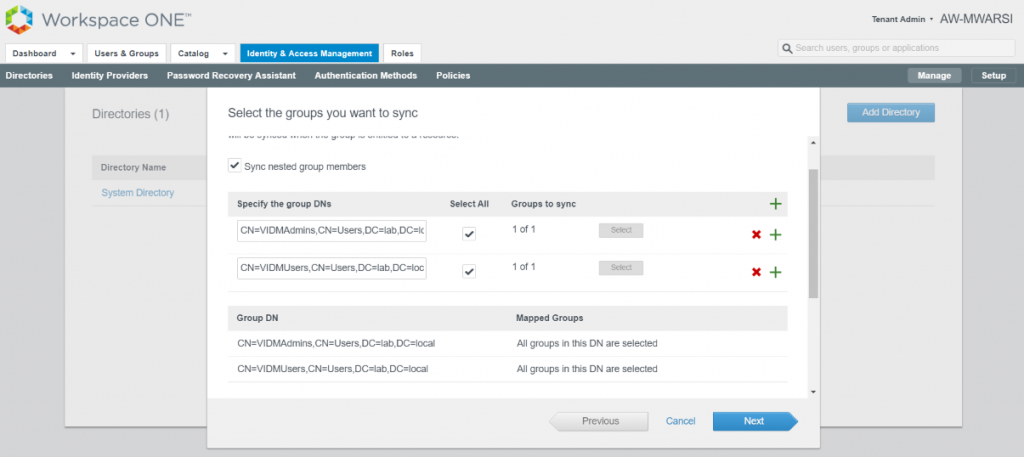
- Enter the DN for the groups which you want to sync with VMware Identity Manager. You can fetch DN from Active Directory. Click Next
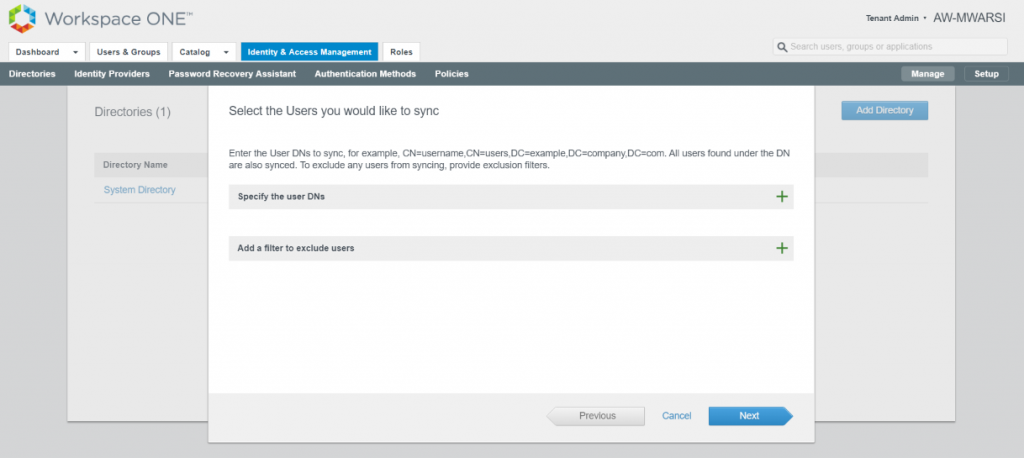
- Enter User DN, if you specifically want to sync user. I left is blank. Click Next
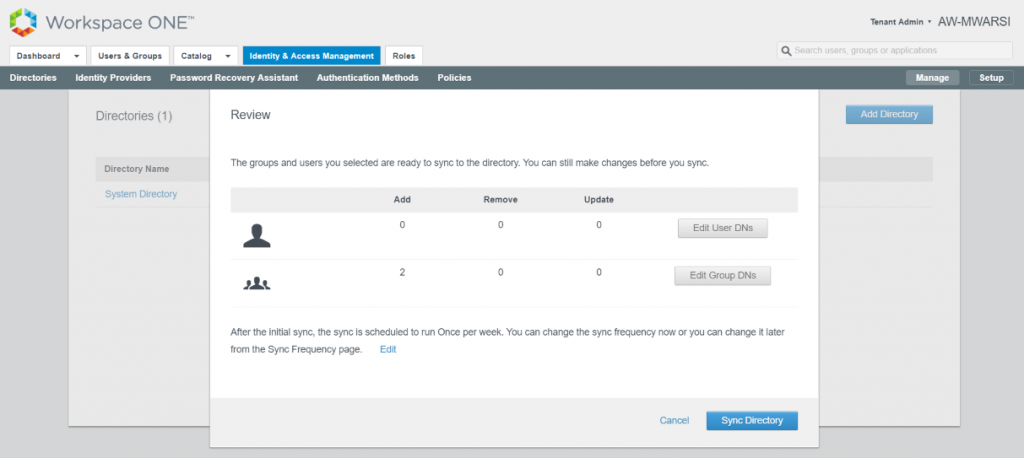
- Dry run is performed and you will see what all users & Groups are going to sync. Click on Sync Directory
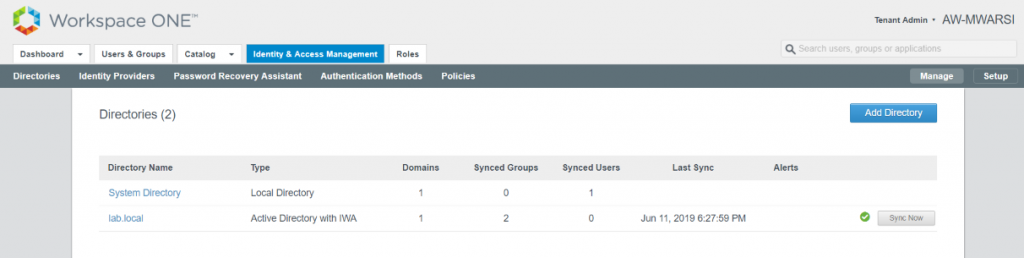
- You can verify the sync status on directories tab.
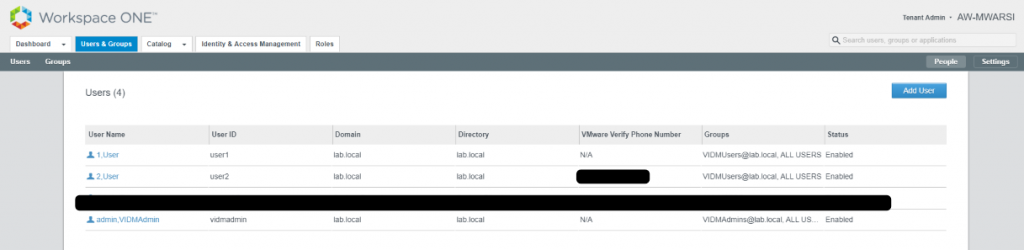
- Navigate to Users & Groups to see synced Users
Note: You need to navigate to Identity & Access Management > Preferences and select “Sync Group Members to the Directory When Adding Group” and Save
Next, we will talk about authentication methods for Intranet users in Part 3 of this series.
Thanks for reading, let me know your feedback.